Finally the plugin is ready and has been published to both SourceForge.net and NetBeans Plugin Portal. In this post I'm going to demonstrate the use of the plugin to build a simple web application.
Prerequisite: I assume that you already have installed NetBeans plugin for Vroom Framework. If not then download it from
Project Website, decompress the zip file and install the .nbm file using Downloaded Tab under Tools/Plugins menu of NetBeans 6.1 IDE.
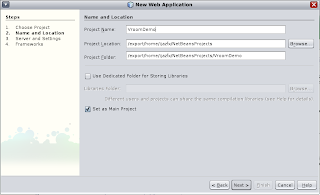
Step 1 - Create a new web project named "VroomDemo"
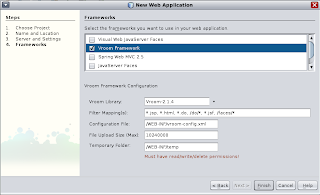
Step 2 - In the frameworks panel, Check Vroom Framework and click Finish.
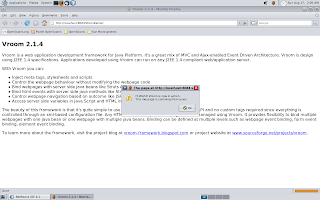
Step 3 - The project will be setup to use the framework. To check that, simply run the application and you should see the following screen.
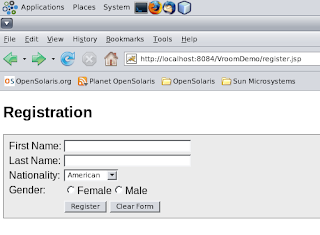
Step 4 - Create a new JSP page named "register.jsp". The page should look like as follows:
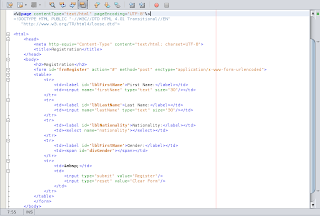
If you notice, firstName and lastName are input tags of type "text" and nationality is select tag. For gender there is no control but a simple span with id "divGender". Don't worry this span will contain gender values as radio buttons.
Step 5 - Create a java class named "RegisterBean" under "com.myco.bean" package and add the following code:
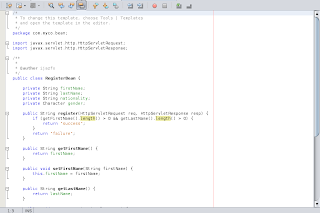
The above java class contains firstName, lastName, nationality and gender properties. There is a method named "register", we'll bind this method with form in the configuration file.
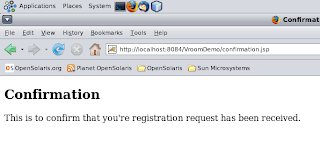
Step 6 - Create a JSP named "confirmation.jsp". The page contents should look like as follow:
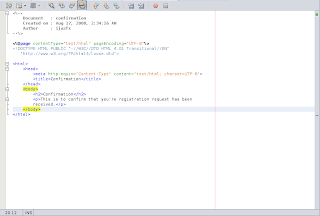
Once the registration is successful, the user will be redirected to this page.
Step 7 - Create a java class named "LookupBean" under "com.myco.bean" package and place the following code:
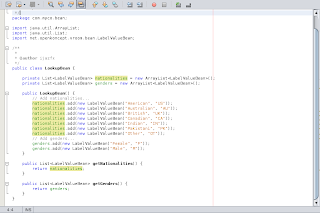
The purpose of LookupBean is to provide list of values e.g. nationalities and genders.
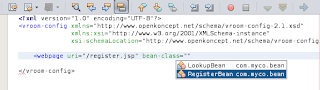
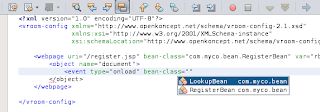
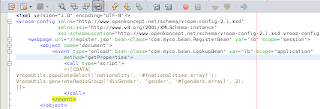
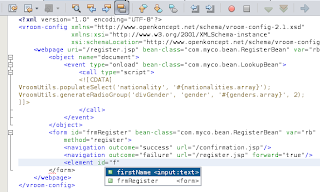
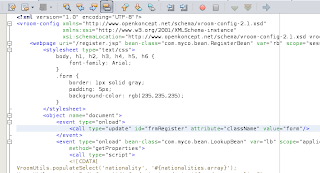
Step 8 - Open vroom-config.xml file by right-clicking on the file and select Open. Delete all existing webpage definitions and defining one for register.jsp as follows:
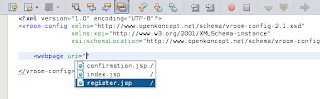
Use Ctrl+Space to initiate Code Completion. The plugin will automatically detect the web pages available in the web module.
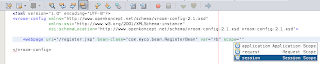
Step 9 - Select "RegsiterBean" as bean-class, "rb" as var and "session" as scope.
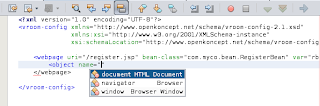
Step 10 - Define object element for webpage and select document for the name attribute.
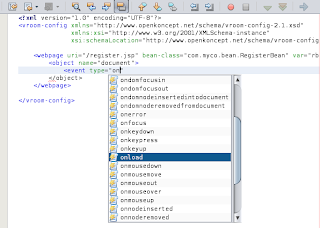
Step 11 - Define event element for object and select "onload" for type and "LookupBean" for bean-class attribute:
Step 12 - Define call element for event and select "script" for type attribute:
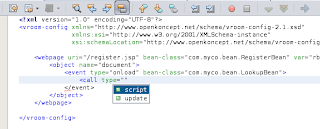
You should select "script" for a call type if you want to execute a script. For updating the contents/properties of the webpage elements, you should select "update".
Step 13: Place the cursor between opening and closing call tag ( <call type="script"> </call> ) and press Ctrl+F1 or Right+Click and select Edit to invoke JavaScript editor:
Step 14: Write the following code in the JavaScript editor:
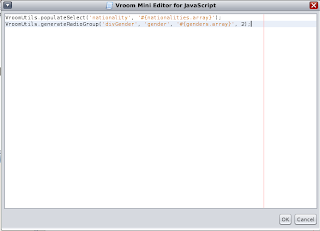
VroomUtils class provide some utility functions that are very helpful to manipulate HTML DOM objects. populateSelect() takes two arguments, select name and the json string. The json string must be an array or list of a bean having "label" and "value" properties. For custom properties, you may use populateSelectEx() which takes four arguments. First two are the select name and json string, the third and fourth are the label and value property name. E.g.
VroomUtils.populateSelect('nationality', '#{nationalities}'); // assumes the json string is an array of beans having label and value property names.
VroomUtils.populateSelectEx('nationality', '#{nationalities}', 'name', 'id'); // where the bean contains name and id as properties.
generateRadioGroup() takes four arguments, the first argument is the div or span id which will contain the radio buttons, the second argument is the name that is assigned to the generated radio buttons. Third argument is the json string which I just explained above and fourth is the no of columns. Since I've two values for gender and I want them to appear on the same line, I've passed 2 as argument value.
For details of the functions you may look into the Vroom-2.1.4.pdf document available as download or the Vroom Framework article avaliable at wikipedia.org.
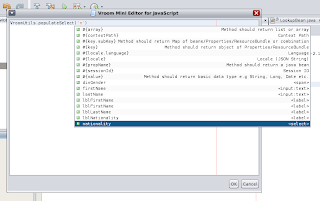
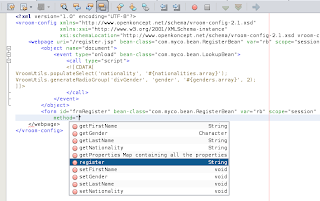
Step 15 - Update the event element defined for document object and add var, scope and method attributes as follows:
If the bean-class has any property available with getter method, the code completion will show "getProperties" in the completion items. It is helpful if you want to access multiple properties by name in a single call. If you select "getNationalities" as method then you won't be able to get "genders" in the same call and instead of using #{nationalities.array} you'll simply type #{array}.
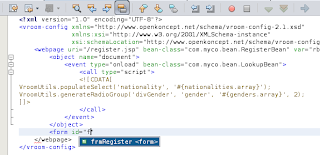
Step 16 - Define form element for webpage and select "frmRegister" as form id. This is defined in the register.jsp:
Step 17 - Complete the form element by defining bean-class, var, scope and method attributes:
For method attribute, select "register" in the list. This will bind the form with "register" method of the RegisterBean class.
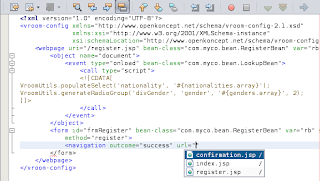
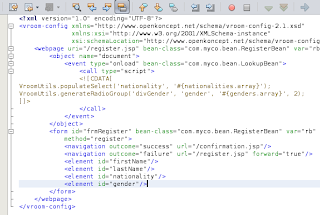
Step 18 - Define navigation elements for form. For outcome "success" the url should be "/confirmation.jsp" and for outcome "failure" it should be the same page i.e. "/register.jsp" with forward attribute set to "true". The forward attribute is very important to preserve the information user entered previously.
Step 19 - define the elements which you want to post when the framework invokes "register" method. The framework automatically populates the fields of the bean-class. If the fields do not belong to the same bean class which is used for form, you may define fine grained definition by defining bean-class, var, scope at the element level. E.g. <element id="firstName" bean-class="com.myco.bean.SomeOtherBean" var="sob" scope="session"/>
Step 20 - Compile and run the web application and type "http://localhost:port/VroomDemo/register.jsp" url. Replace the port with the port no. of your tomcat server. You'll see the following webpage:
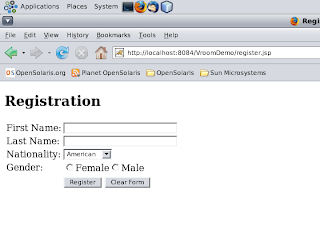
Note that the divGender span tag contains "radio" buttons to select gender. These are dynamically generated as a result of generateRadioGroup() method of VroomUtils javascript class.
Step 21 - Type first name, select nationality and gender and click submit. The server will display the same webpage populating the fields you entered.
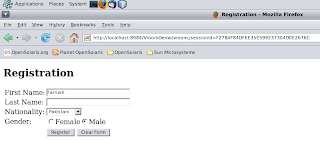
Observe the url in the browser. This is because the response has been forwarded.
Step 22 - Enter the last name as well and submit the form, you'll get confirmation.jsp webpage:
That's all about the web application development. Let's see below how we can play with the look and feel of the web pages using call element:
Define stylesheet element for webpage as follows:
Observer that I've added another call element of type "update" for document object, for which I've selected "frmRegister" as id of the element for which I want to update the contents/properties, "className" as attribute and "form" as value. This form is defined as .form in the stylesheet element of the webpage.
Run the application and see the difference:
I'll soon upload a more complex examples involving EJBs, Web Services and Integration with Struts Framework.
Thanks for spending time to read the post. I believe this post has given you the clear idea about what is Vroom Framework and how you can utilize it.
Please don't forget to post your views about the framework.


