Okay! No more advertisements for Vroom Web Framework. This time, I'll show you how easily you can build Web Applications using EJBs, Yahoo UI and Vroom Plugin 1.1.0 for NetBeans IDE 6.1.
Step 1 - Create a new Project and select Enterprise Application under Enterprise Category:

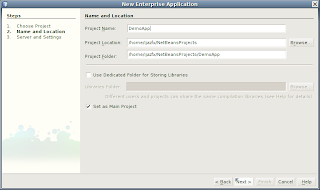
Step 2 - Enter the Project Name "DemoApp" and click Next!
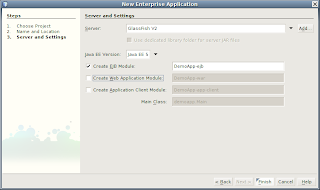
Step 3 - Uncheck Create Web Application Module CheckBox and Click Finish! We'll build Web Application separately.
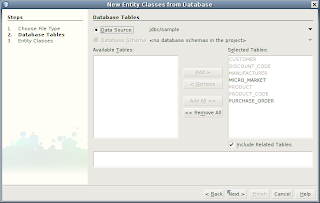
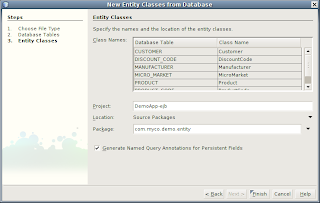
Step 4 - Create Entity Classes from Database using jdbc/sample database in DemoApp-ejb project.
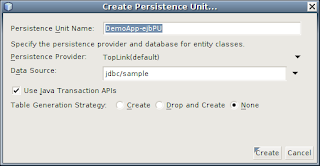
Step 5 - Create a Persistence Unit named "DemoApp-ejbPU" for jdbc/sample data source.
Step 6 - Keep the Class Names as is, enter "com.myco.demo.entity" in Package field and click Finish!
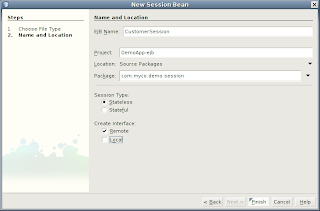
Step 7 - Create a SessionBean named "CustomerSession", enter "com.myco.demo.session" in Package field, check Remote check box, uncheck Local check box and click Finish!
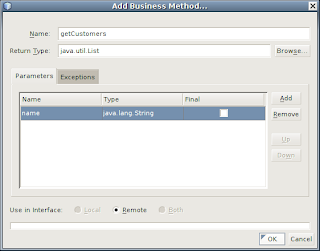
Step 8 - While being inside CustomerSessionBean.java file, select EJB Methods/Add Business Method... from the context menu to add a business method. Enter "getCustomers" in the Name field and "java.util.List" in Return Type Field. Add Parameter "name" of type "java.lang.String" and click Finish!
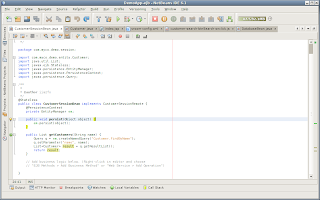
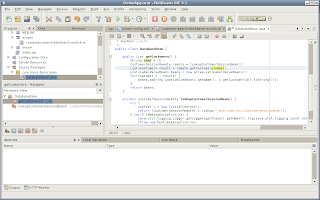
Step 9 - The CustomerSessionBean.java should look like as follows:
Step 10 - One small change we'll make to the Named Query "Customer.findByName" as follows:
@NamedQuery(name = "Customer.findByName", query = "SELECT c FROM Customer c
WHERE LOWER(c.name) LIKE :name")
At this stage or EJB is ready as per our requirement. Now we'll create a web application which will use this CustomerSessionBean to get customers list and display it in Yahoo UI DataTable.
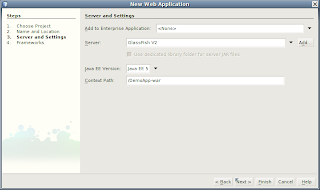
Step 1 - Create a Web Application named "DemoApp-war" and click Next!

Step 2 - Make sure you don't include the application to the DemoApp Enterprise Application. Select GlassFish from the server list and click Next!
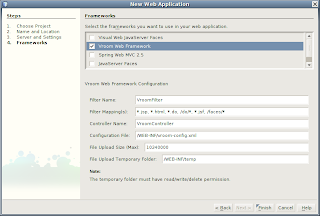
Step 3 - Check Vroom Web Framework from the Frameworks, leave the properties of the framework unchanged and click Finish!
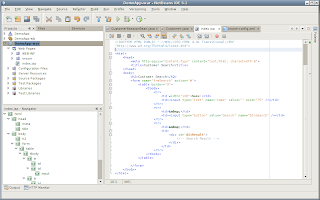
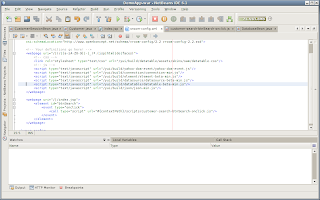
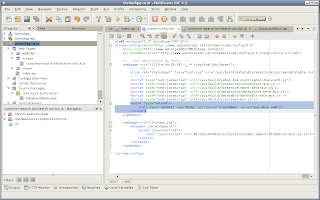
Step 4 - Change the HTML code of index.jsp as follows:
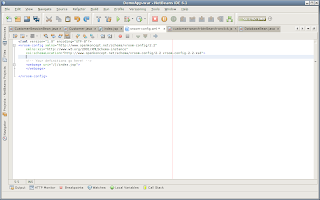
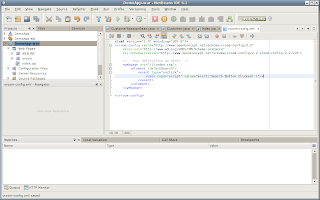
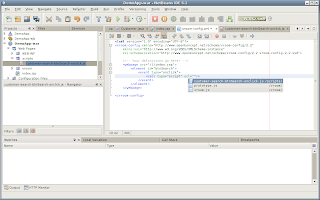
Step 5 - In vroom-config.xml file, remove the default web page definition and add webpage definition for index.jsp as follows:
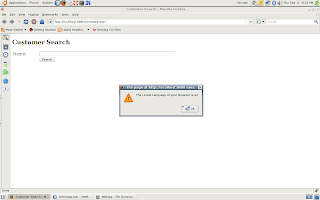
Step 6 - Debug the web application and you'll see the following webpage in the browser:

Step 7 - Now, in vroom-config.xml, modify the definition for index.jsp as follows:
Step 8 - Debug the application and click "Search" button, you'll see the message "Search Button Clicked".
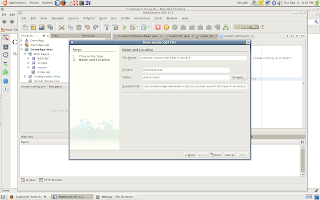
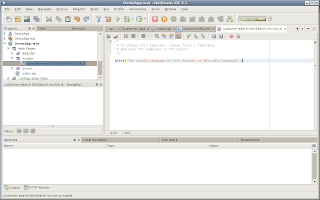
Step 9 - Create a javascript file named "customer-search-btnSearch-onclick.js" under "web/scripts" folder.
Step 10 - Edit the javascript file and add following code:
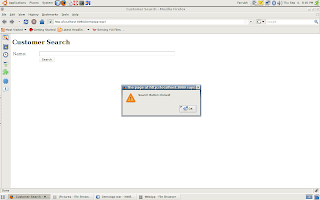
Step 11 - In vroom-config.xml, change the index.jsp definition as follows:
Step 12 - Debug the application and click "Search" button. This time you'll see the alert that was placed in customer-search-btnSearch-onclick.js file.
Vroom Web Framework is very powerful because it provides you flexibility to attach javascript files to every single event. These javascripts are not ordinary scripts, these have access to server methods implicitly and you're not required to include them in the webpage head tag.
Now we are going to create a Java file which we'll access in the javascript file we just created:
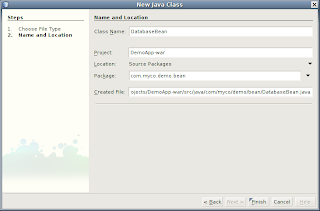
Step 1 - Create a Java class named "DatabaseBean". Enter "com.myco.demo.bean" in the Package field and click Finish!
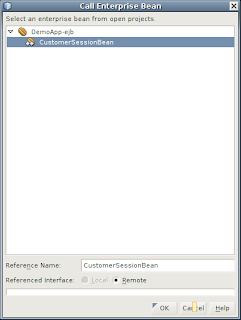
Step 2 - While being in the DatabaseBean.java, select Enterprise Resources/Call Enterprise Bean... from the context menu, select CustomerSessionBean in the list and click OK!
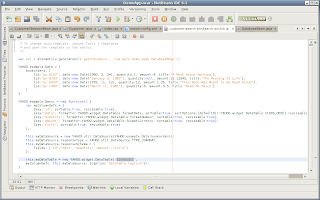
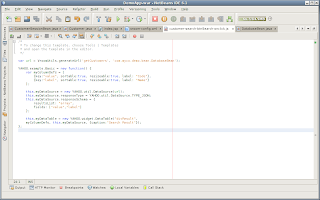
Step 3 - Add a method in DatabaseBean named "getCustomers". The code of the DatabaseBean.java should look like as follows:
Step 4 - Replace the javascript code of customer-search-btnSearch-onclick.js with the following:
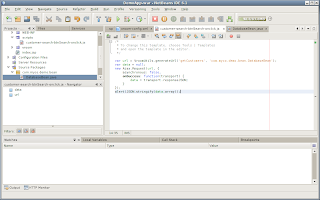
In the above code, we're building the url using VroomUtils.generateUrl() method. The method takes four arguments, first two are mandatory. The arguments are "method", "beanClass", "var" and "scope". In the above javascript we've passed "getCustomers" as method and "com.myco.demo.bean.DatabaseBean" as beanClass.
Step 5 - Debug the application and click "Search" button. This time you'll see the list of customers in JSON format in an alert.
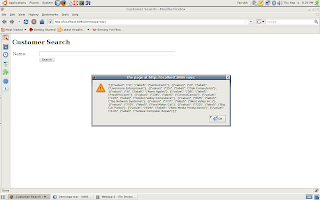
The alert is just to check that we're getting correct results. Now we're going to add Yahoo UI DataTable.
Step 1 - First of all we need to identify what YUI scripts and CSS files are required to use the DataTable. To check that we'll use YUI Dependency Configuration using the following URL:
http://developer.yahoo.com/yui/articles/hosting/#configure:
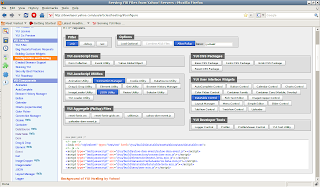
Select Connection Manager, JSON and DataTable in the configuration. In my setup I've deployed complete YUI library as a war file to my GlassFish server with /yui/ context. All the scripts and CSS are available under "build" folder which can be accessed with base /yui/build/.
Step 2 - The YUI Dependency Configuration Utility will give the list of required CSS and JS files. Just copy the files, and paste in a text editor. Replace all href= and src= with url= also replace "> with "/> and replace with empty string. This will make the script and link tags compatible with vroom-config.xml tags. Create a new webpage definition to include all the webpages as follows:
Step 3 - Copy the code of YUI Basic Data table from the following location:
http://developer.yahoo.com/yui/examples/datatable/dt_basic.html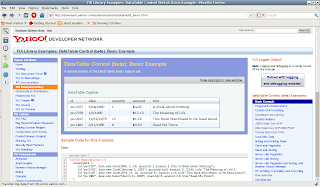
Step 4 - Place the DataSource script and DataTable script in the customer-search-btnSearch-onclick.js file. Replace the "basic" parameter of DataTable with "divResult".
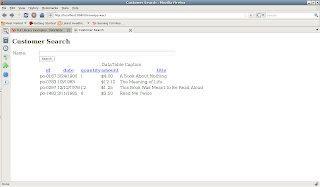
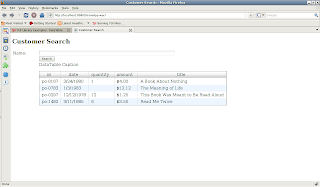
Step 5 - Save the files and Debug the application. Click Search button and you'll see the following table.
There is no skin applied to YUI components by default. To apply that we need to set the class attribute of the control or body tag to "yui-skin-sam".
Step 6 - Instead of setting the class in every webpage, Vroom Web Framework helps us to apply these settings by just defining simple rules in vroom-config.xml file. The rules are applicable to single file or a group of files based on uri pattern. To set the "yui-skin-sam" class to every webpage, modify the rule in vroom-config.xml as follows:
Step 7 - Debug the application and you'll see the skin applied to the DataTable as follows:
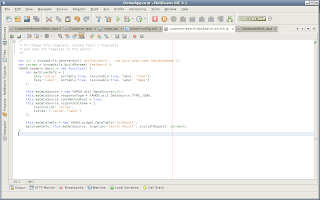
Step 8 - Now, we need to tweek the code to load the DataTable from the server data. Modify the customer-search-btnSearch-onclick.js file as follows:
Note that we've used the url we generated using VroomUtils.generateUrl() method in DataSource constructor. Another important thing to note is we've also defined resultsList: "array". The reason for specifying this is because Vroom Web Framework adds the returned object to an internal Map and converts the Map to JSON object. All basic data types are accessed using "value" key and Lists and Arrays are accessed using "array" key.
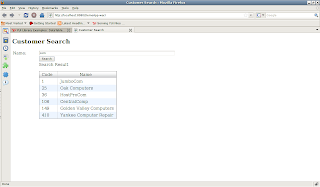
Step 9 - Now refresh the webpage and click Search button and you'll see the YUI DataTable is loaded with our Customers list.
Step 10 - Now we need to pass the customer name entered in the text box to the function. To do so, modify customer-search-btnSearch-onclick.js file as follows:
Step 11 - Modify the getCustomers() method in the DatabaseBean class as follows:
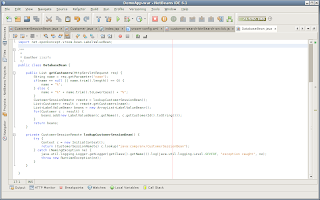
If you note, you'll find that when we created the getCustomers() method first time we didn't define the HttpServletRequest parameter. But this time we added it as a parameter. The reason for this is Vroom Framework can deal with three types of method signatures:
public void|Object method();
public void|Object method(HttpServletRequest);
public void|Object method(HttpServletRequest, HttpServletResponse);
You can return any type of java object, the framework will try its best to convert it to JSON string.
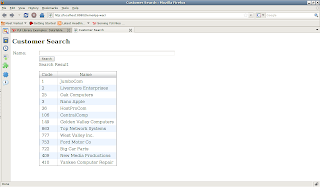
Step 12 - Now Debug the application and type "com" in the text box and click Search button. You'll find only those customer which contain "com" in their name.
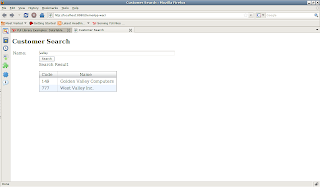
Step 13 - Try another by typing valley in the text box and click Search button and you'll find only those customers which contain valley in their name.
That's all folks. I hope this time I tried my best to explain the potential of the framework. No matter what web framework you use, you can always empower your web application with Vroom Web Framework. No other framework provides such a powerful and flexible way to control your application.
Please do provide your feed back about the framework.


