Step 1 - Let's start creating a Web Project named "VroomL10nApp" as follows:

Step 2 - Select either Apache Tomcat or GlassFish as Server and click Next!

Step 3 - Check Vroom Web Framework in the frameworks list and click Finish!

Step 4 - Create a jsp page named "login.jsp" as follows:

Step 5 - Add following code to login.jsp:

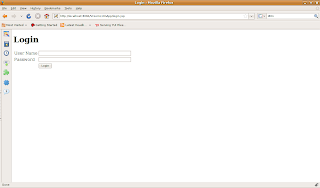
Step 7 - Debug/Run the application and you'll see the following page:

Step 8 - Add following definitions to vroom-config.xml file:

The first definition in vroom-config.xml tells the framework to update contents on all the pages as per call elements on page load. Right now the value of all the call elements is static.
Step 9 - Add a java class named "ApplicationBean" as follows:

Step 10 - Add a resource bundle named "Bundle" as follows:

Step 11 - Add your favorite locale to the resource bundle by selecting "Add Locale..." from the context menu of Bundle.properties file node in the project tree and click OK!

I've chosen Arabic because arabic language flows from right to left and in this post we'll see how direction can be controlled using the framework.
Step 12 - Open the Resource Editor by selecting "Open" from the context menu of the Bundle.properties node and add following resources:

Step 13 - Add a method named "getBundle" to ApplicationBean.java as follows:

Step 14 - Replace the definition in vroom-config.xml as follows:

If you notice we've changed the static values with #{key} where key is the key of the property available in resource bundle. We also added bean-class and method attributes for onload event. If the var and scope is not specified, the framework create an instance of the bean-class in the application scope using bean-class as variable name as well.
Step 15 - Debug/Run the application page and you'll see the login page as follows:

You may not feel the difference in this login page and the previous login page. But we'll see it once we switch the other locale we added previous to the resource bundle. In my case it's arabic.
Step 16 - To add and switch to the desired locale, open the browser options and locate language preferences. I'm using FireFox 3 on linux so "Edit -> Preferences" will open the browser preferences. Choose "Content" tab and click "Languages" button. You'll see the following options as follows, add your desired locale by clicking "Select a language to add..." button and move the added locale to first position by clicking "Move Up" button.

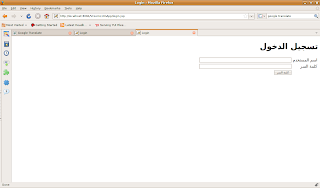
Step 17 - Refresh the browser page by pressing Ctrl+F5 and you'll see a different login screen based on the locale selected:

Note that the direction is automatically changed from ltr to rtl, which is defined in the resource bundle as "direction" property.

No comments:
Post a Comment